This is my latest personal engine project. After building Source SDK from source and playing around with Hammer editor, I decided to put what I’ve learned so far into use.
Scripting Demo Video
Here are four short levels showcasing the basic features.
Rendering
Vulkan Renderer
The first version of this engine was actually in OpenGL: Haru Engine. As you might’ve guessed, the ‘V’ in Haru-V is for Vulkan.
Here’s a screenshot of the original Haru Engine. It doesn’t have PBR rendering.
Later I decided to rewrite it with Vulkan because I learned Vulkan a while ago and wanted to give it a try.
Who doesn’t love an API which takes more than 500 lines for the first triangle?
The engine got a huge performance boost after migrating to Vulkan. With OpenGL it used to struggle to hit 30 fps on a Radeon Vega 8 (integrated). Now it can maintain 60 fps on that same graphics card with Vulkan.
Deferred & Forward Rendering Pipeline
Here’s a graph of the rendering pipeline:
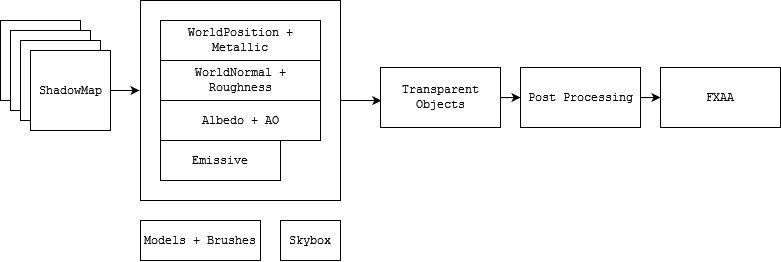
It’s a very standard pipeline and there are basically four passes:
- Cascaded Shadow Maps (Depth Only)
- Render shadow-casting objects to shadow maps
- Deferred Pass (HDR)
- Render every opaque object
- Render skybox
- Forward Pass (HDR)
- Share the depth buffer with Deferred Pass
- Combine deferred buffers and calculate PBR lighting
- Render transparent objects
- Post Processing (Tone-mapped to LDR)
- Add post processing effects
- FXAA
Technically there’s another UI pass after this, but from a pipeline perspective there’s nothing interesting with it since it’s just plain 2D rendering.

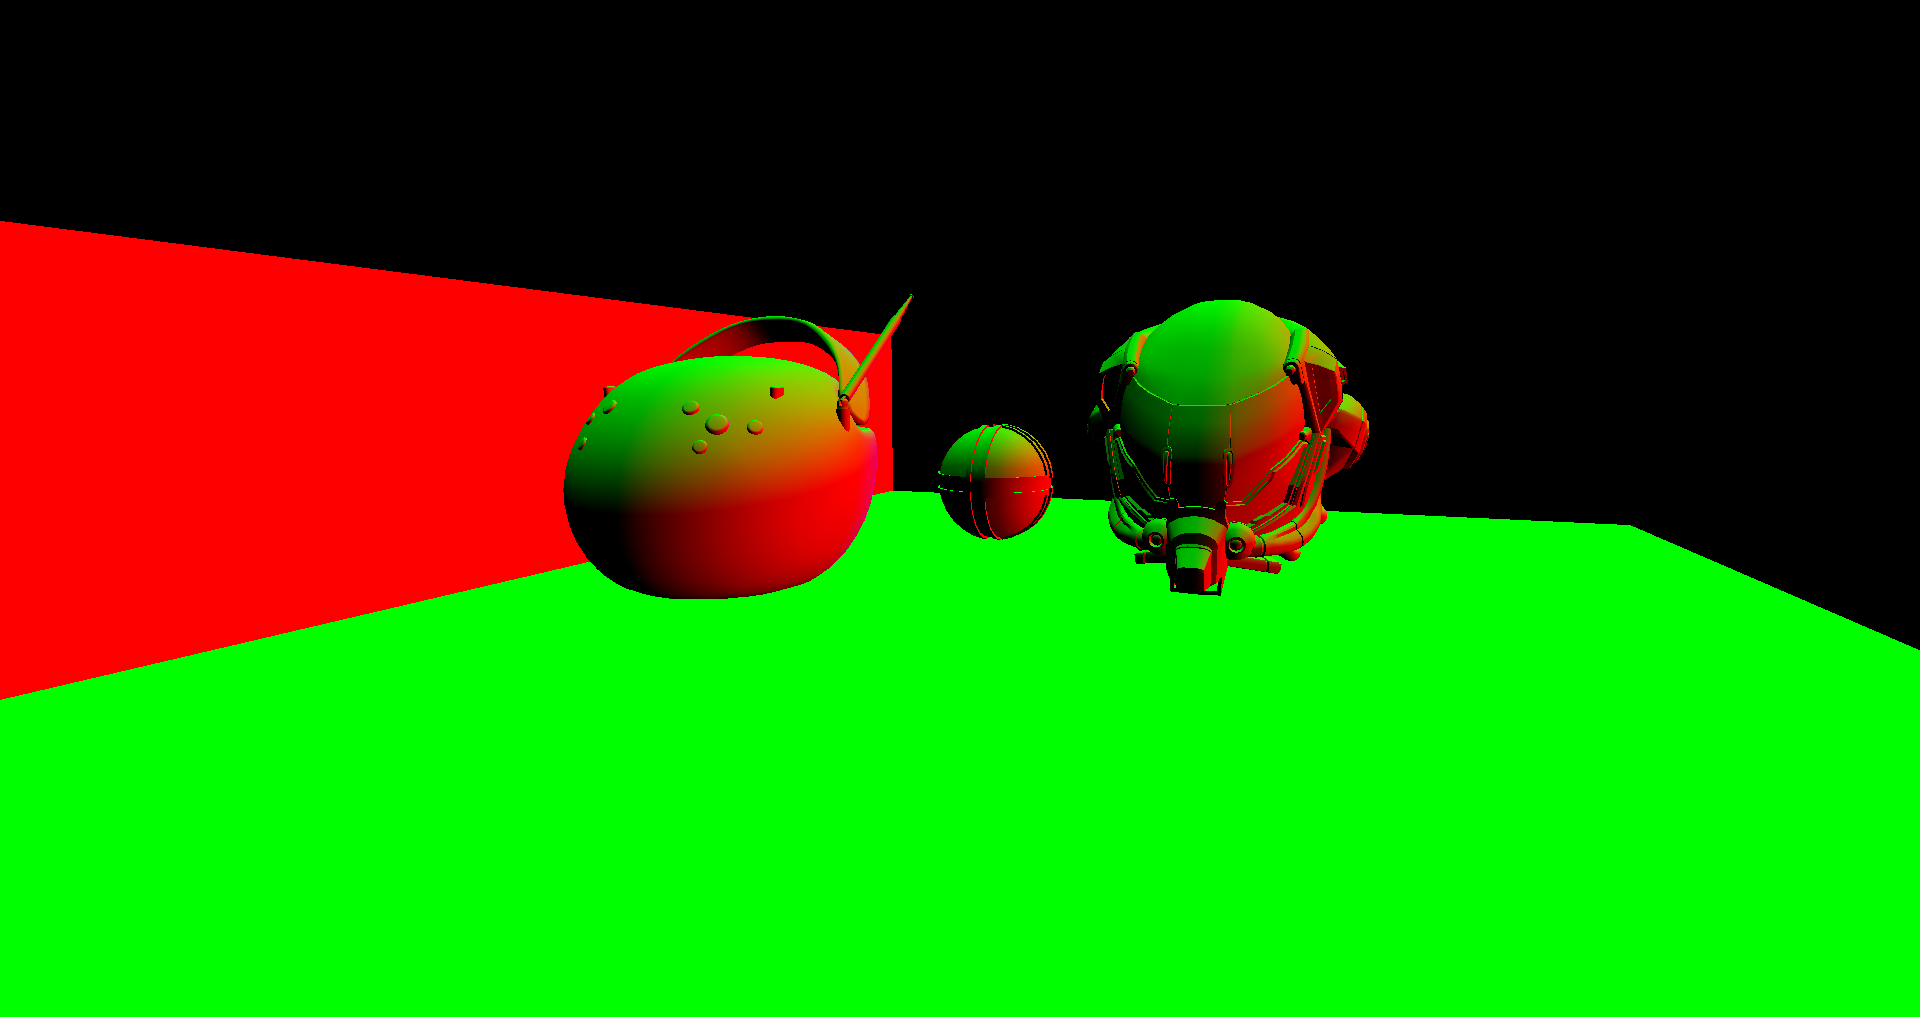
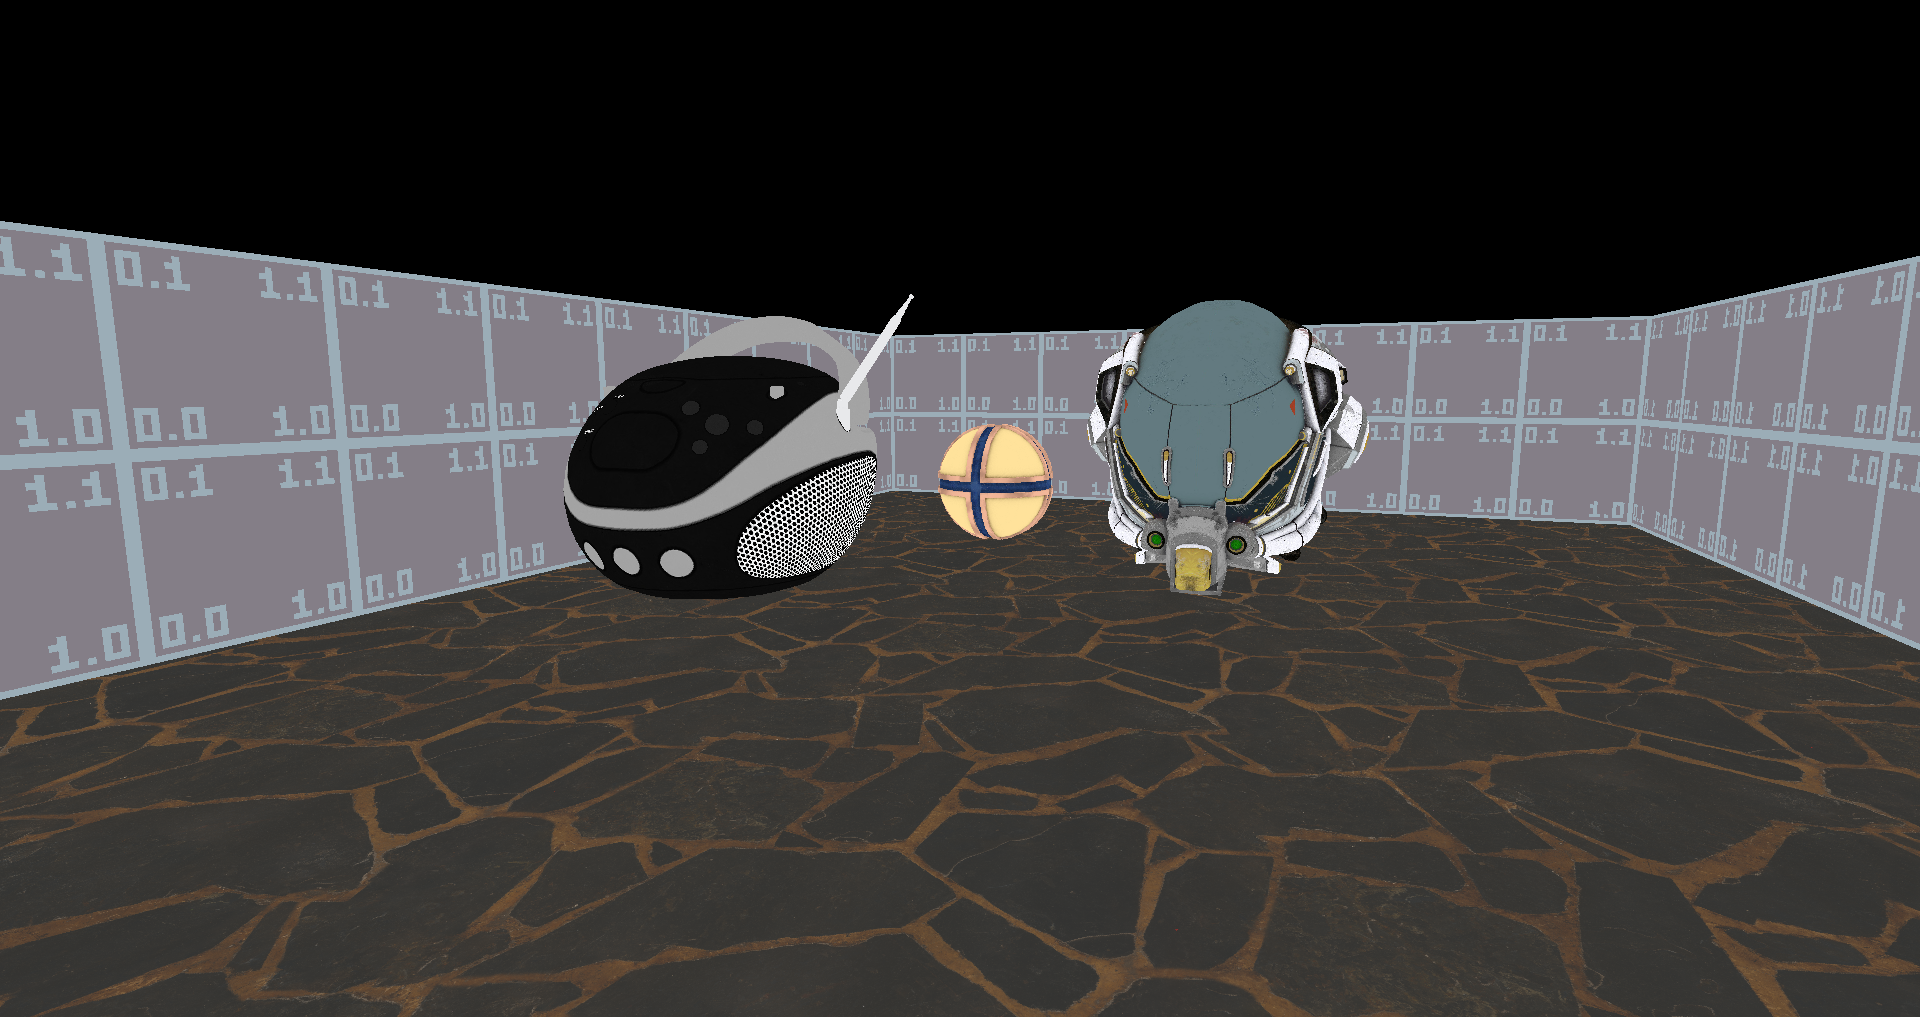

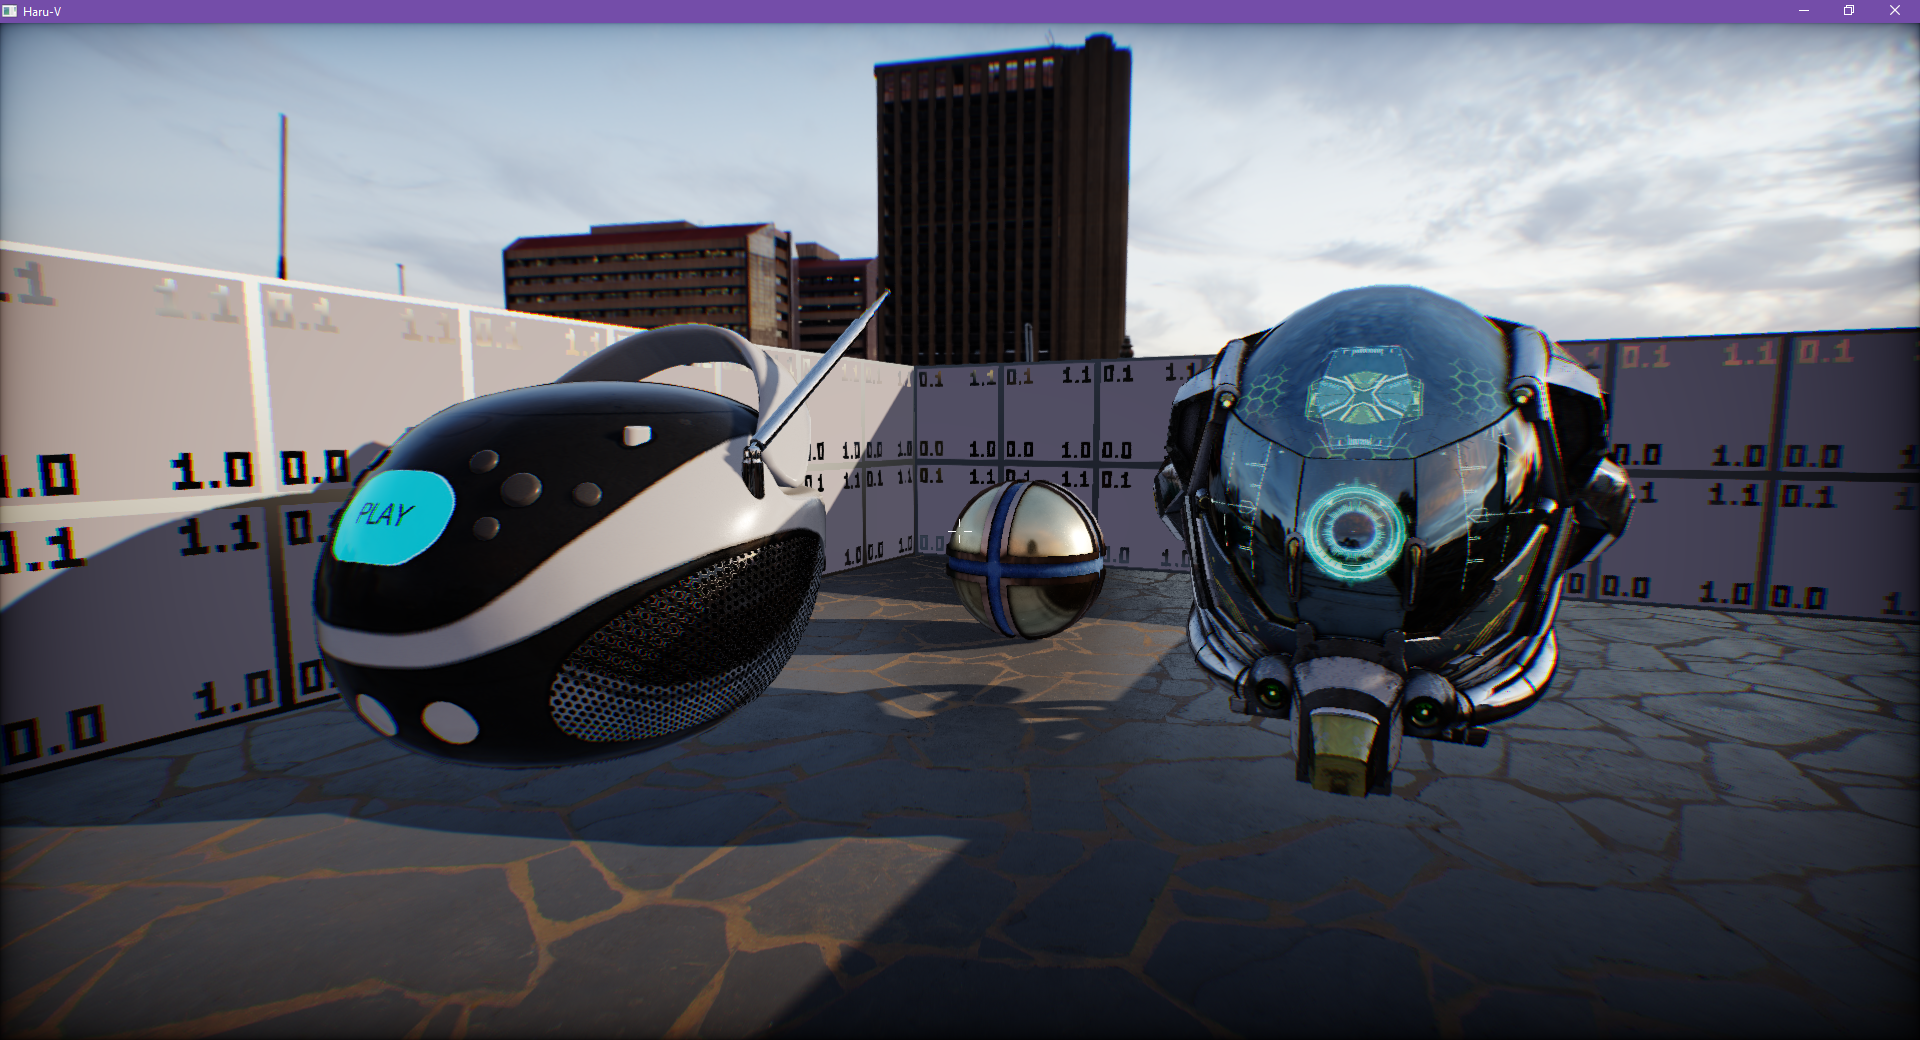
Physically Based Lighting
I had lots of experience working with PBR materials in Unity and Unreal, but I’ve never implemented PBR from scratch before this project.
So in this project I basically followed tutorials like LearnOpenGL for PBR. The Epic notes on Unreal 4 PBR also helped a lot.
The result works great:
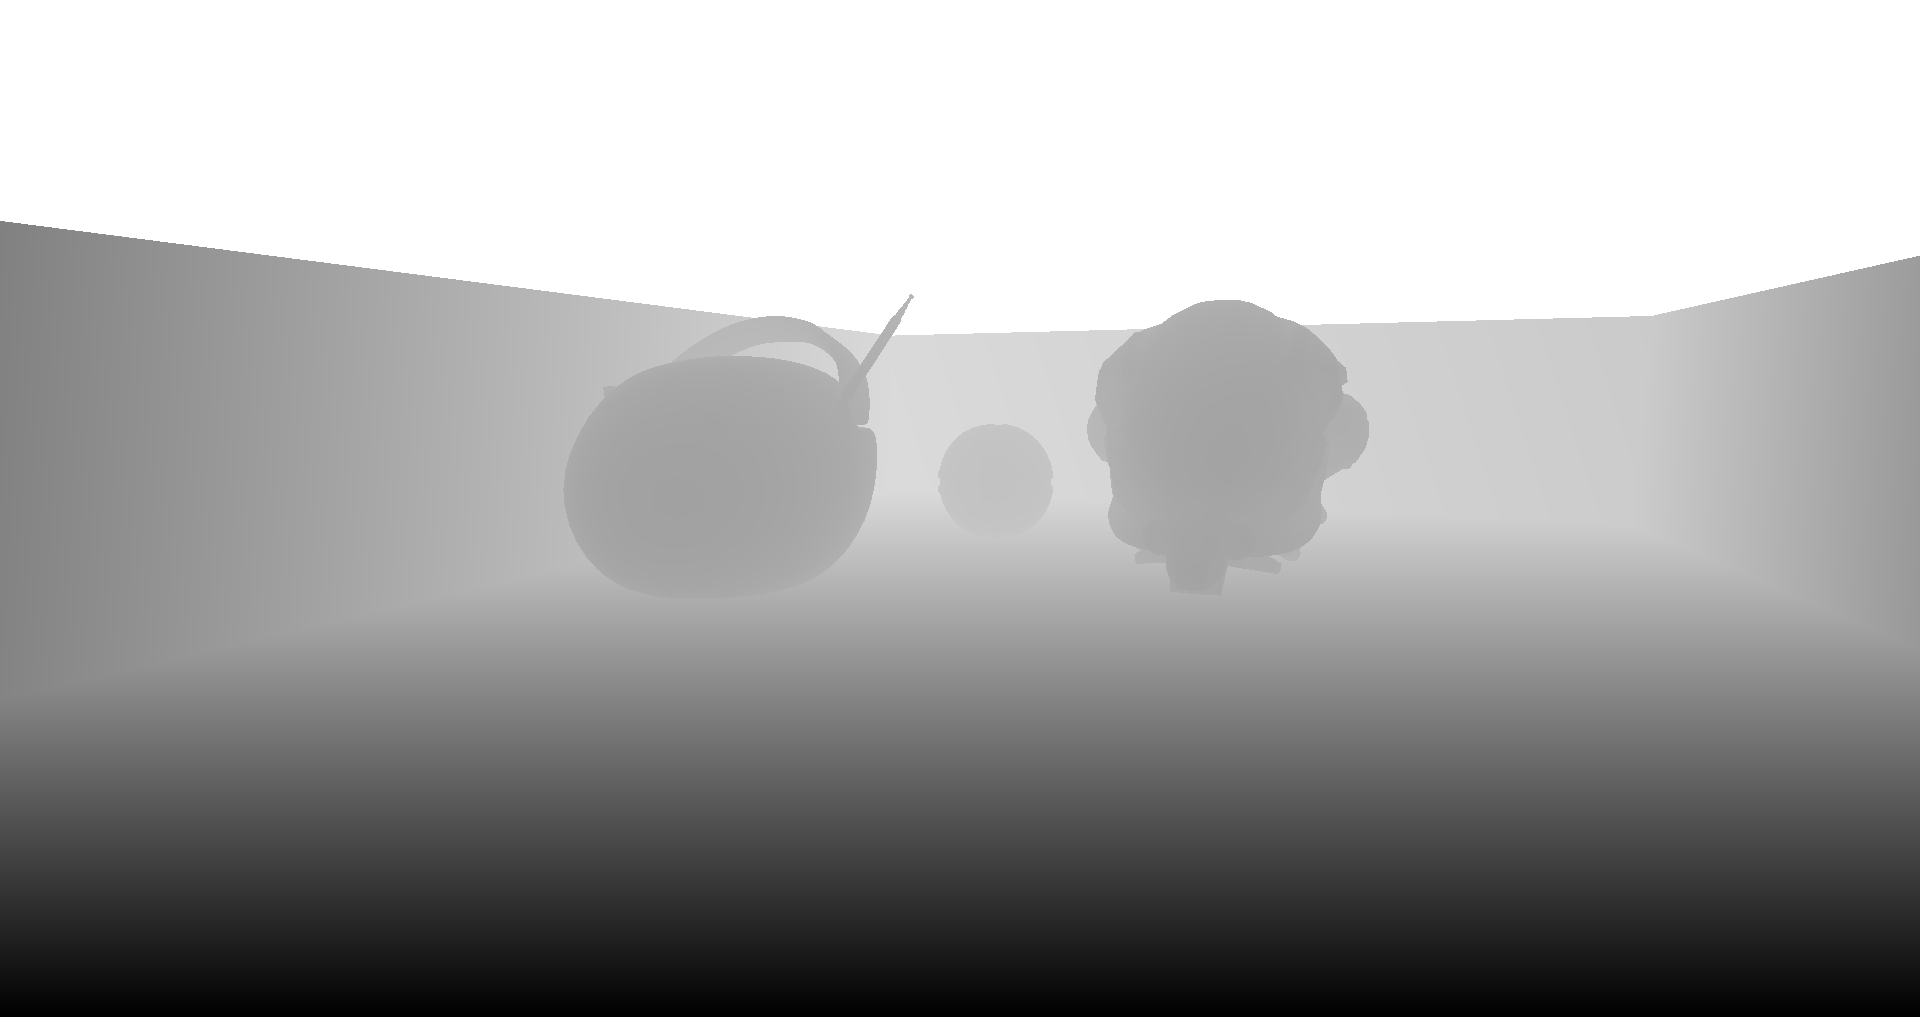
Cascaded Shadow Map
The Cascaded Shadow Map implementation was largely based on the Guest Article from LearnOpenGL. I also tried to implement some techniques from the Microsoft tutorial on CSM (mainly the Depth Bias ones).
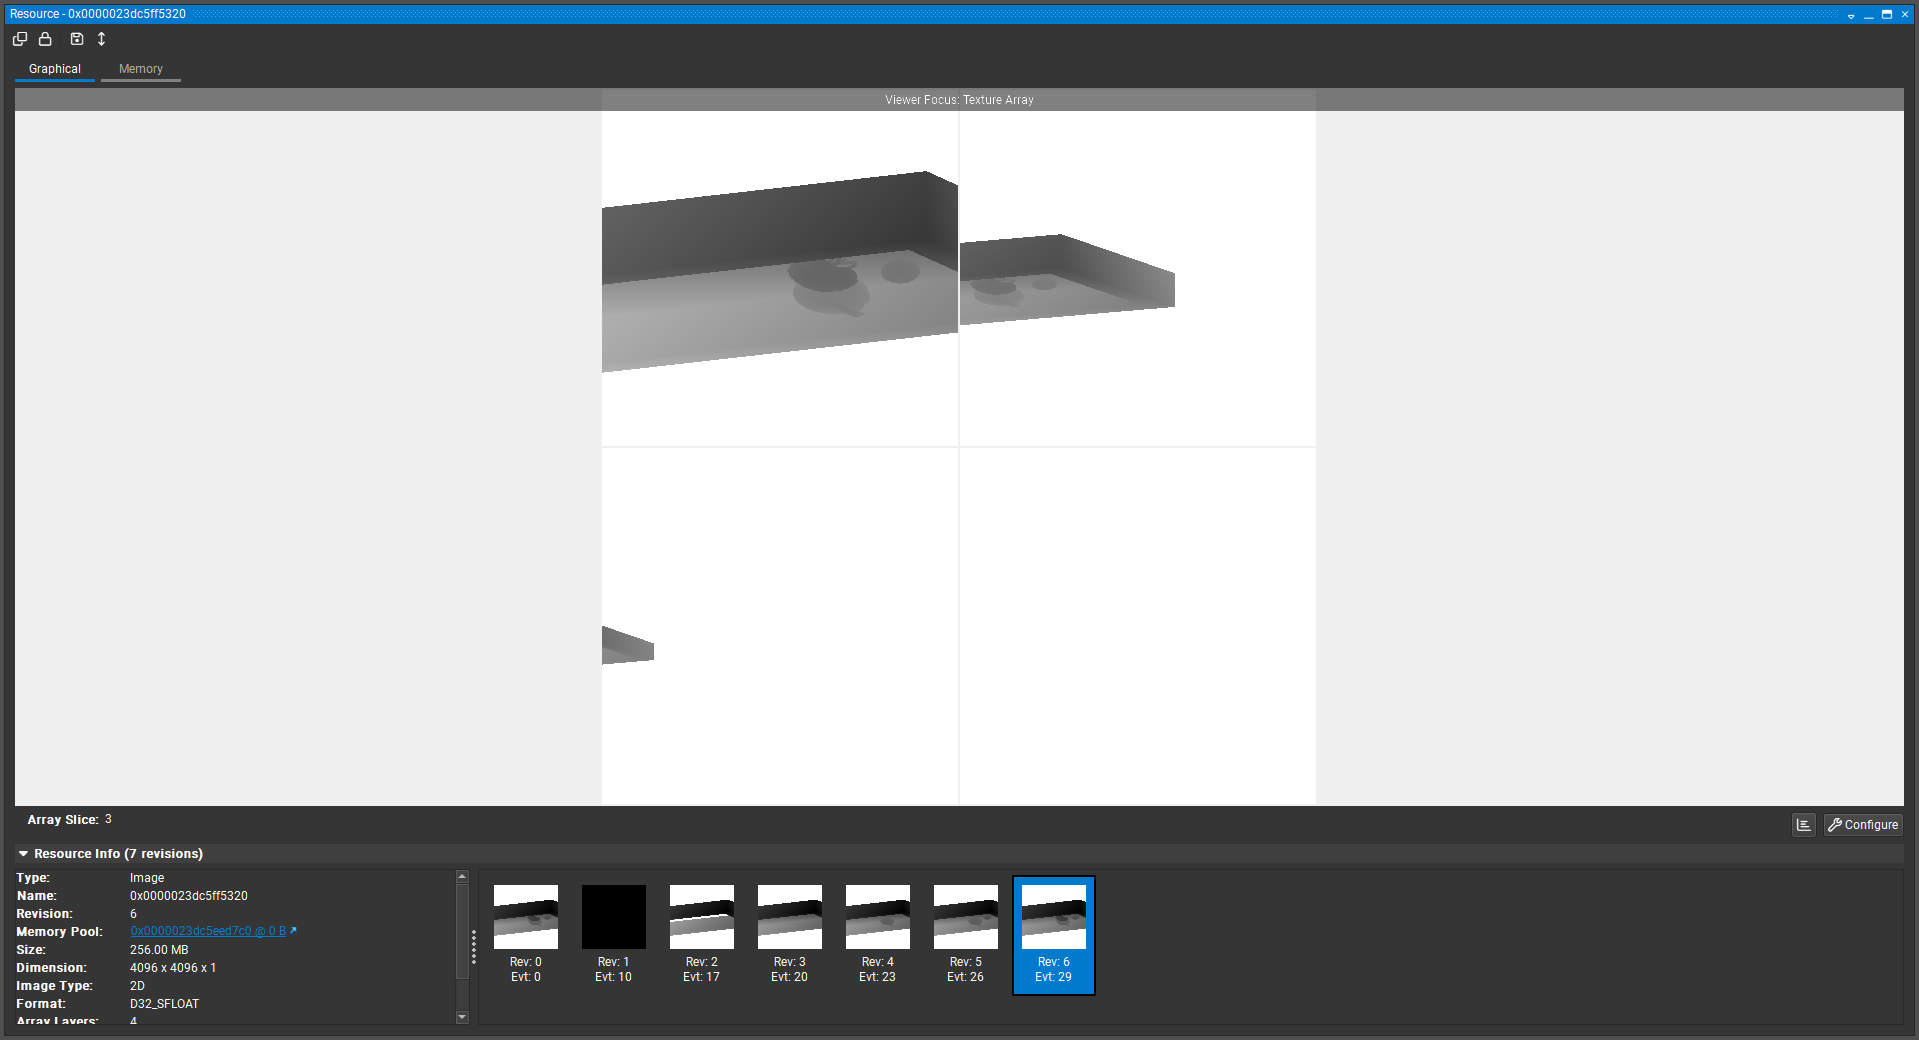
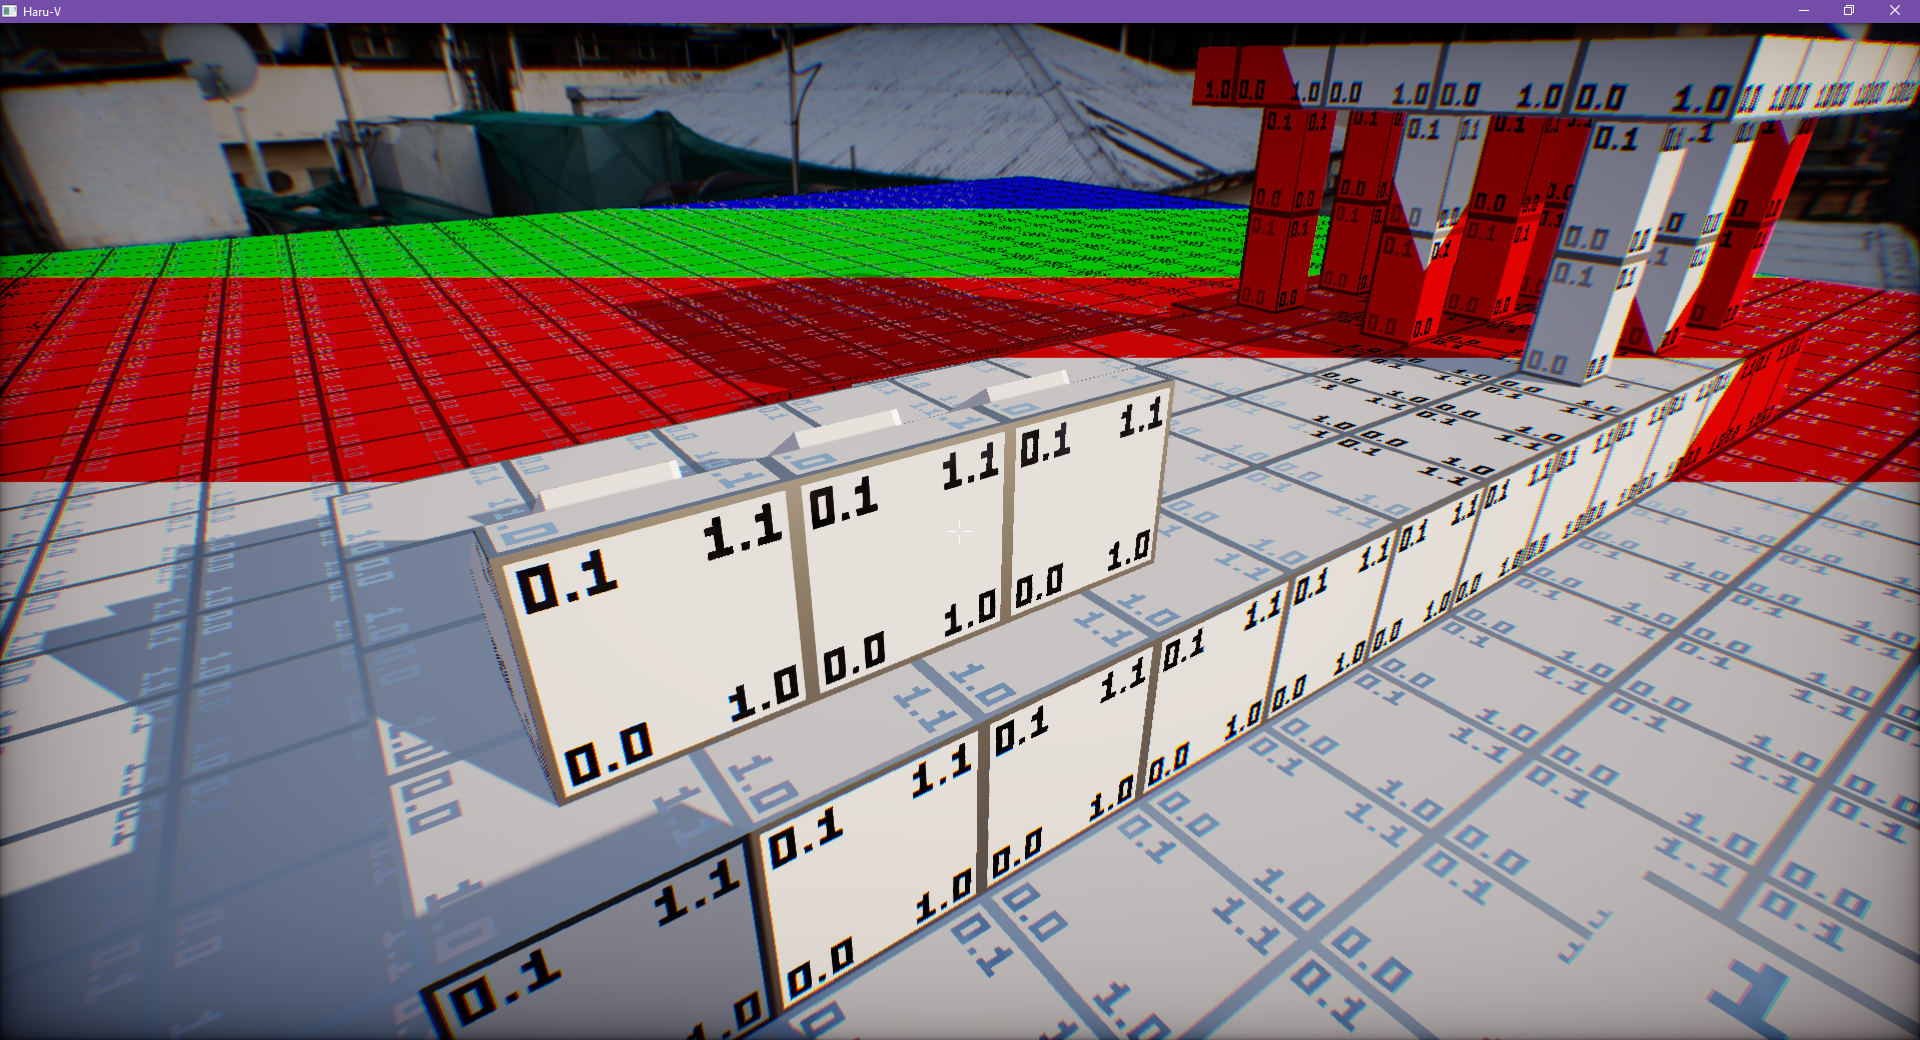
Here’s an image visualizing the CSM cascades:
glslang Runtime Shader Compilation
Vulkan only supports loading shaders from SPIR-V, which is kind of painful for development. As a workaround I simply embedded a glslang compiler into the engine so that I can load glsl files directly.
I also wrote a simple wrapper so that the #include directives works.
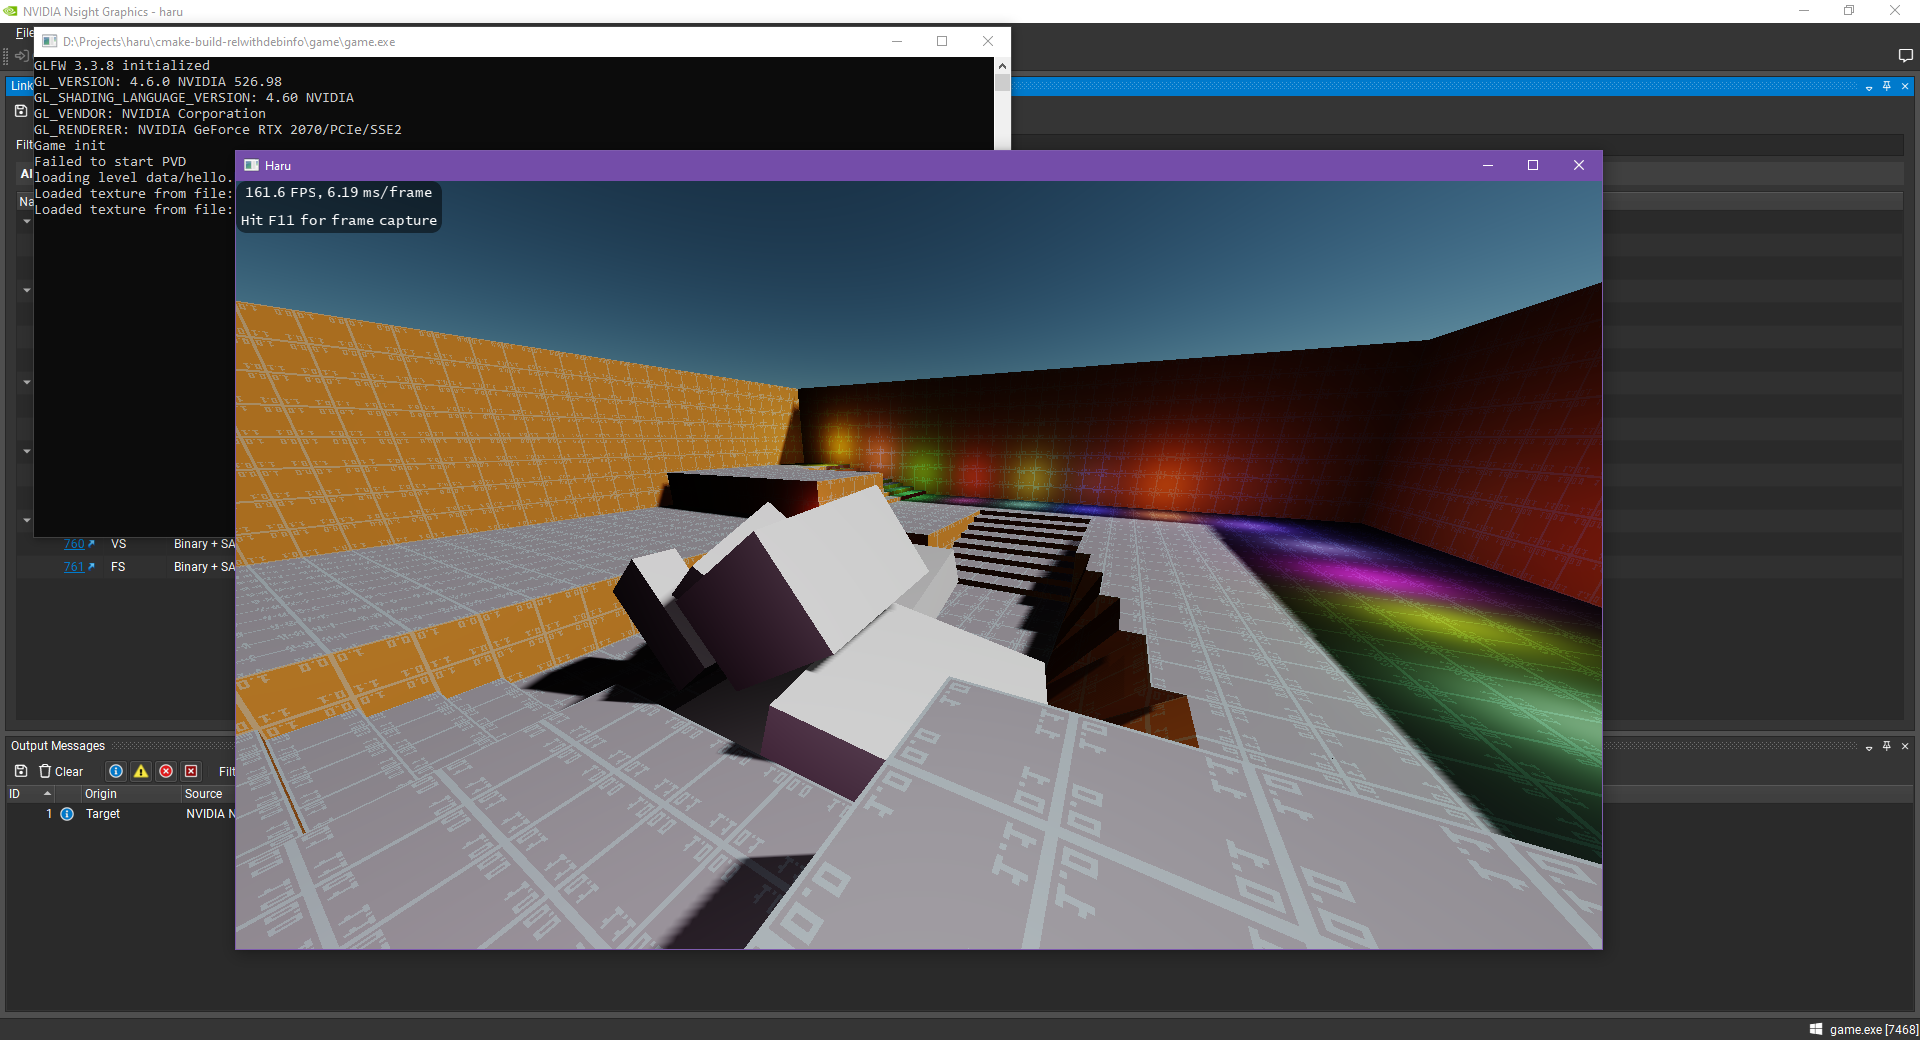
Here’s a screenshot of glslang working at runtime when the engine starts up.
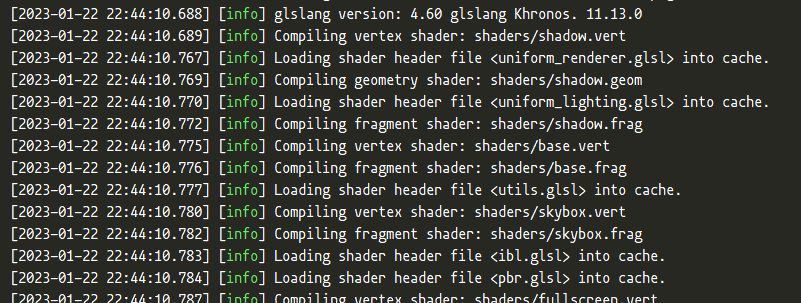
It’s easy to do some persistent caching but I don’t have that many shaders yet.
FXAA Integration
I integrated FXAA 3.11 made by NVIDIA into the engine. It could use more tweaking but I think it works well enough now.
I removed the out-dated parts (Xbox 360 and PS3 stuff) from the code so now it only contains the PC Quality version.

From left to right: Without FXAA; Pixel Difference; With FXAA
Level Editing
Modified TrenchBroom
For map editing, I modified the TrenchBroom editor and wrote a custom FGD for my game.
And this is the modified TrenchBroom in action:

There’s no midification made to the UI so it doesn’t look very different from the original TrenchBroom.
Custom level format
At first I was going to support the Quake BSP format, but soon I realized it’s going to take too long before I can get something functional, so I just designed my own map format and wrote a simple exporter for TrenchBroom.
It’s a very simple binary format but it covers almost everything TrenchBroom can export:
- Map
- Entities[]
- Properties[]
- Key
- Value
- CSG Brushes[]
- Convex Hull
- Vertices[]
- Faces
- Face Normal
- Face Vertices
- Convex Hull
- Properties[]
- Entities[]
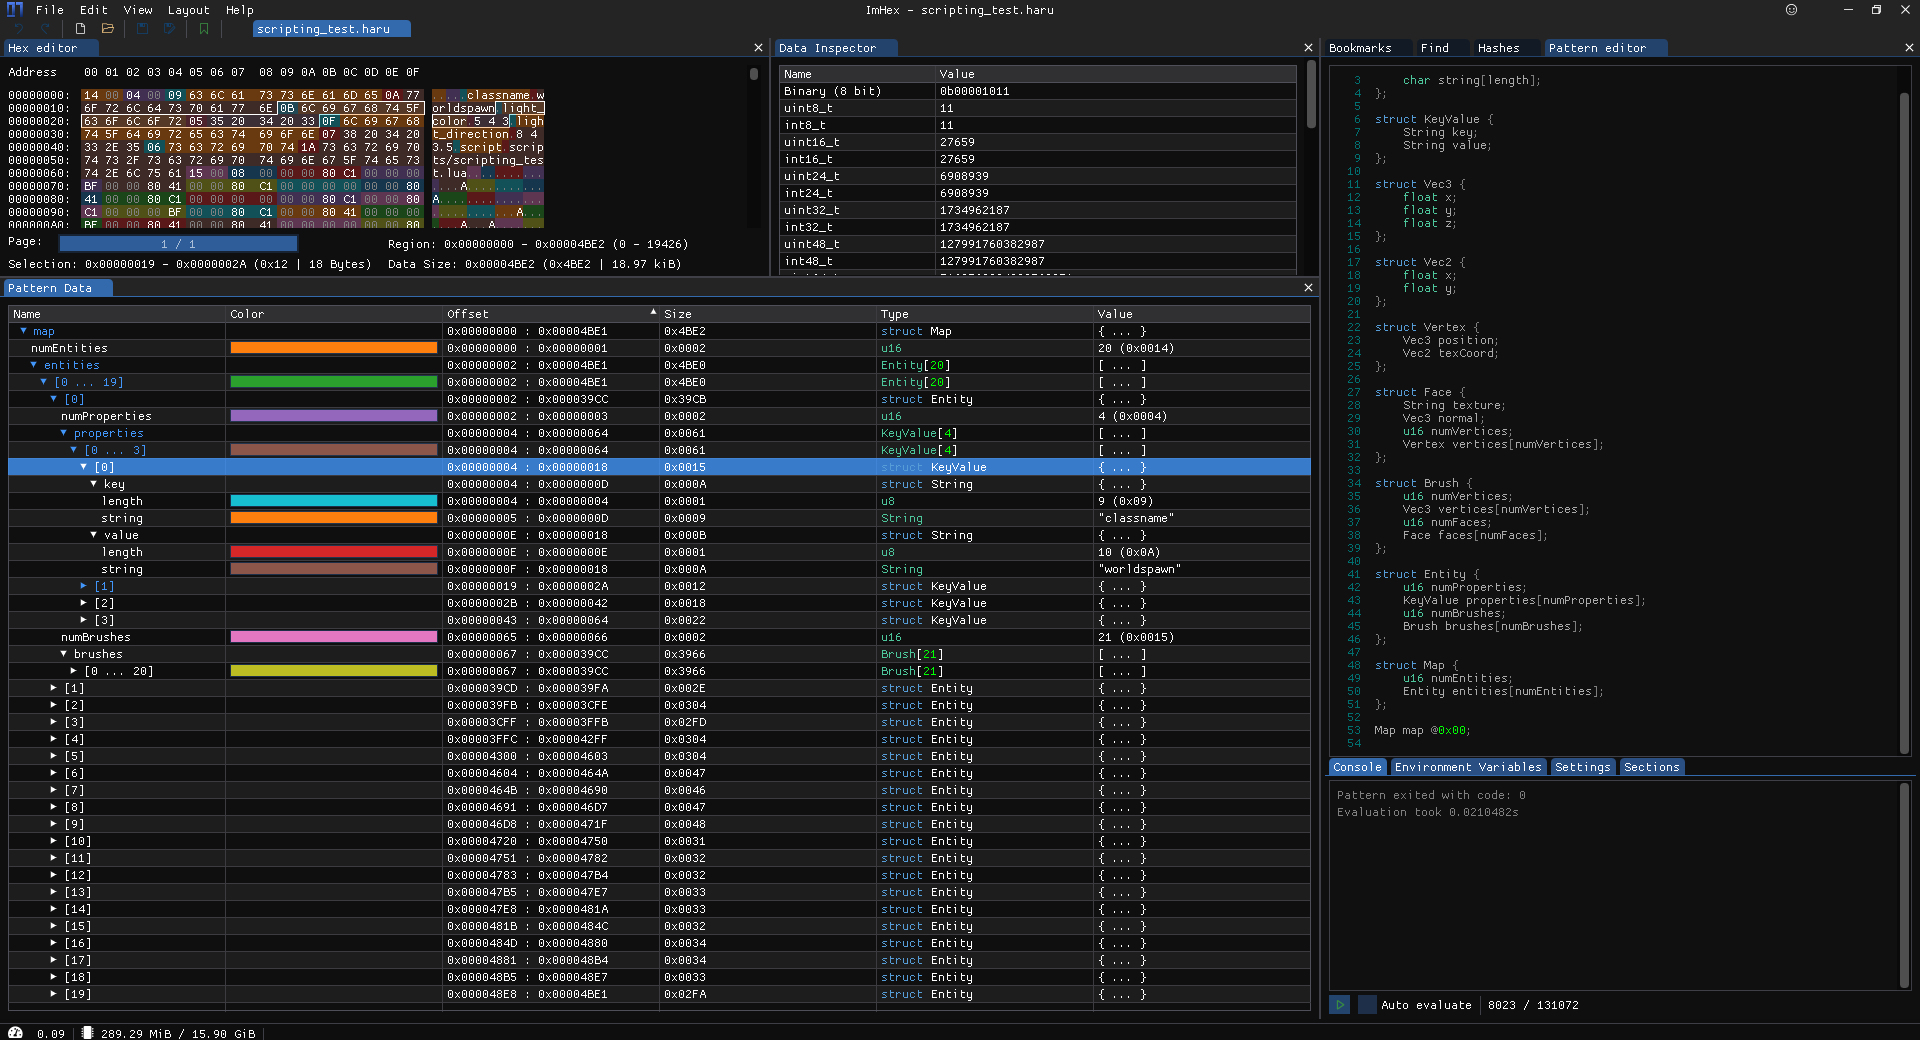
And a sample map file looks like this in ImHex:
Gameplay
First-person controller
A while ago I made some experiments in Unity trying to implement a robust first person controller from scratch.
I started with just the plain PhysX character controller and got the essential features like walking, jumping, and riding platforms to work robustly, but I didn’t have a great idea of where to go next back then.
With this new Haru-V engine I soon realized that I needed a robust player movement implementation in PhysX, and I happened to have one!
Unity uses PhysX as the physics backend and its physics module is basically just a thin wrapper of Physx. (Unlike Unreal which builds on PhysX and implements a whole new movement system like UCharacterMovementComponent)
Static/kinematic/physically-simulated CSG brushes
CSG brushes (BSP brushes, or Convex Hulls if you are a math guy) are probably the most iconic feature in Quake-like engines.
In case you haven’t noticed, I’m a big fan of retro gaming and those old technologies.
With the help of TrenchBroom, it’s super easy to integrate those into my engine:
- TrenchBroom is designed for CSG modelling, so I don’t need to worry about that.
- I used my custom exporter to export those CSG meshes and did some pre-processing.
- I simply loaded the CSG brushes and generate meshes, materials, and convex PhysX colliders for them.
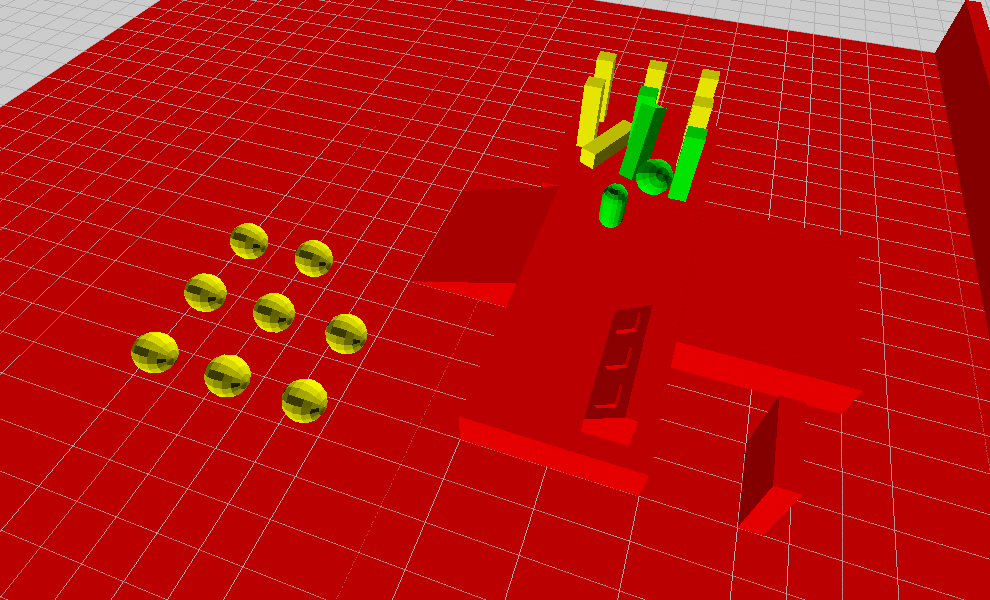
CSG Brushes in PhysX Visual Debugger
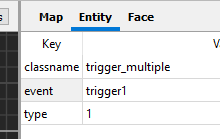
Quake/Hammer style entities
Here are some example entities from my custom FGD (Forge Game Data) file:
@BaseClass = MoveLinear [
    move_speed(string) : "Move Speed" : "0.0 1.0 0.0"
    move_time(float) : "Move Time" : 1.0
]

@SolidClass base(MoveLinear) = func_move : "Movable Brush" [
    name(string) : "Name"
]

@SolidClass base(MoveLinear) = func_button : "Button Brush" [
    event(string) : "Event" : "onPressed"
]
Basically I tried to keep them simple but also powerful enough for making some interesting gameplay.
Thanks to my Lua scripting support, I don’t have to add too much level scripting properties on my entities.
Scripting
Entity Events
I implemented a simple signal system so that game entities can trigger and handle events.
Basically it works like this:
1. Entities can trigger Lua events:
2. Level designers can write scripts in Lua to handle these events:
function trigger1(event)
  if event == "enter" then
    signal("door1", "open")
  end
end
3. Entities can handle Lua signals in C++:
// Actor.h

class Actor {
    // ...
    virtual void LuaSignal(lua_State *L) {}
    // ...
}

// GameLua.h

SetGlobalFunction("signal", [](lua_State *L) {
    const std::string name = luaL_checkstring(L, 1);

    // actors need to register themselves into a lookup table so this is an O(1) lookup
    Actor *actor = g_Scene->FindActorWithName(name);
    if (actor != nullptr) {
        actor->LuaSignal(L);
    }
    return 0;
});
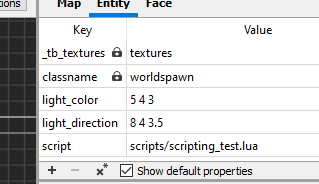
Lua Level Script
As you can see above, the level logic is mostly done with Lua script.
When loading the map, the engine will execute the script designated in the worldspawn entity, which is a unique entity for all static geometries. worldspawn is similar to the AWorldSettings actor in Unreal engine, which contains the world properties.
In the level script, level designers can handle the events from entities. The level script above now looks like this with the signals library support:
local signals = require("scripts/signals.lua")

trigger1 = signals.triggerEnter(function()
  signals.open("door1")
end)
signals library is just a simple functional programming library to make everything more declarative.
Sound
FMOD Integration
I think this is probably the 4th time I integrated FMOD into my C++ engine, so everything went pretty smoothly.
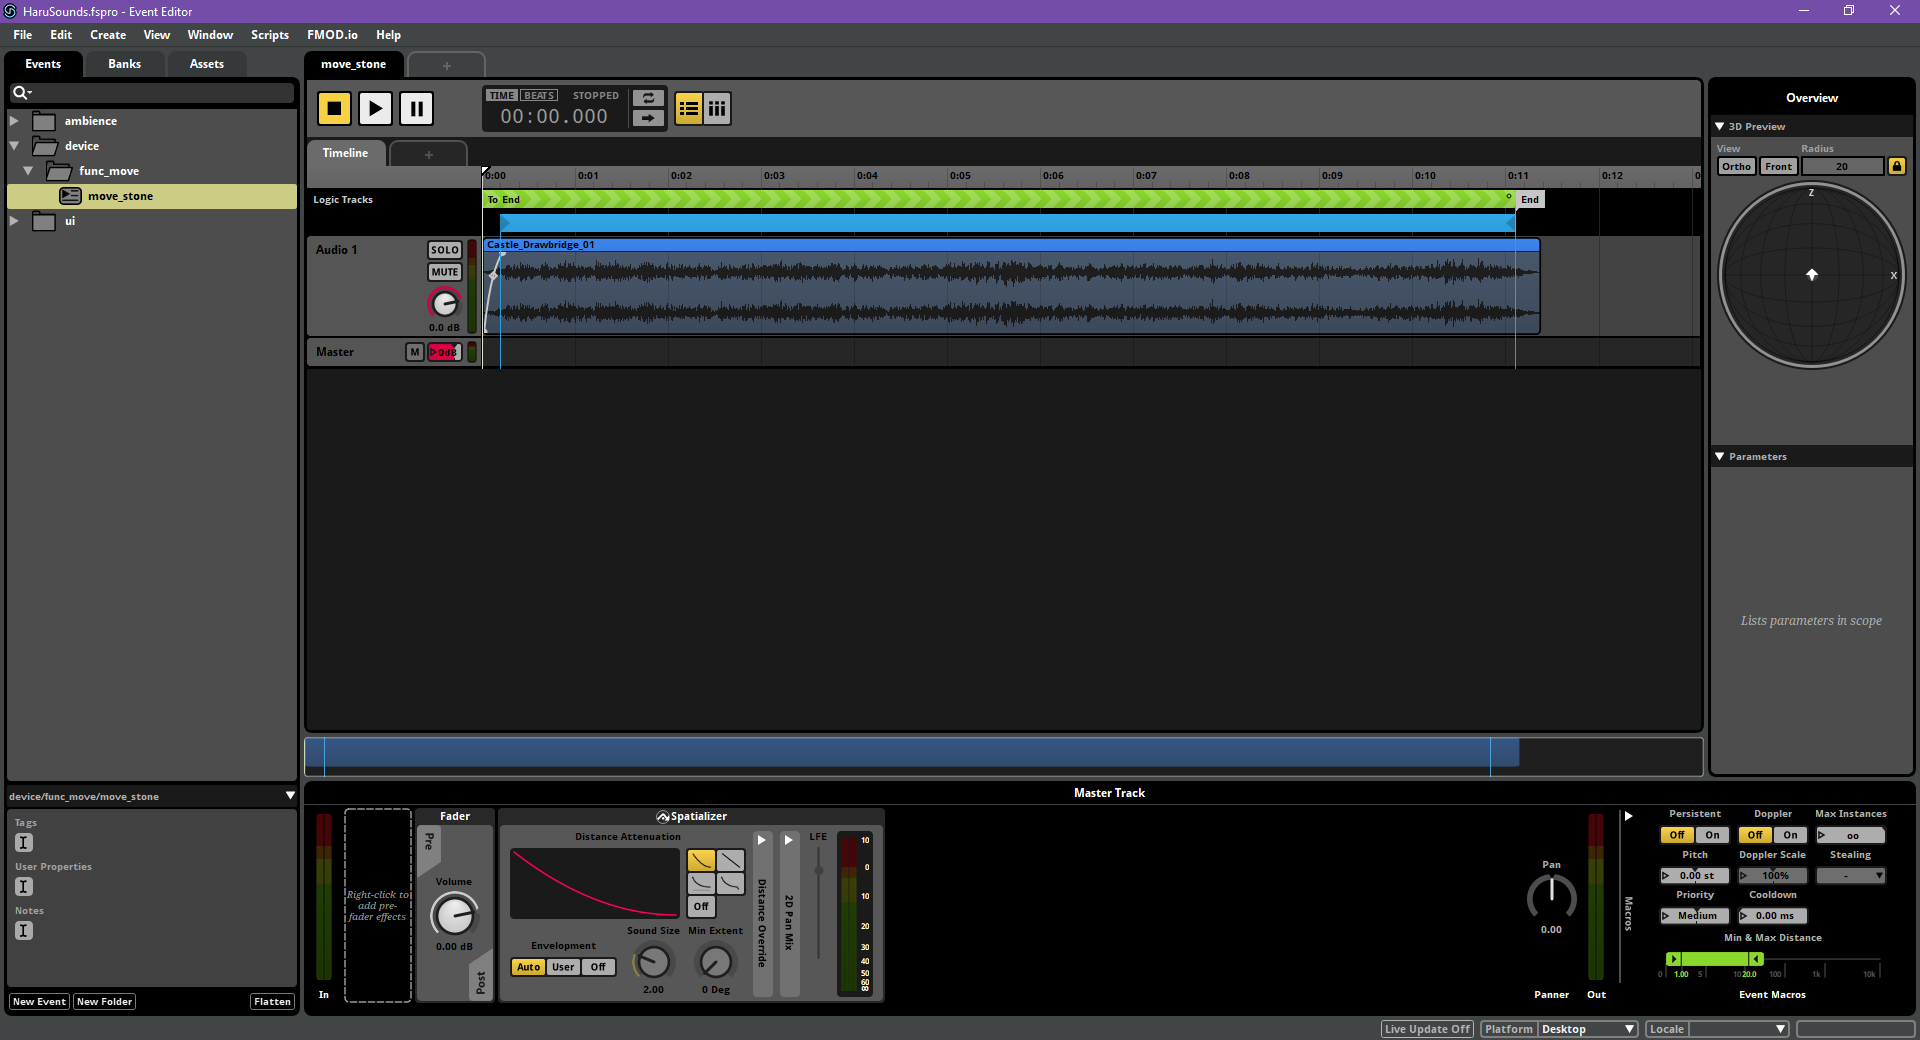 The FMOD event for doors. A simple looping event with intro and outro.
FMOD has a very friendly license for personal/indie projects so I always use it for my personal projects whenever I need audio.
Physics
PhysX 5 Integration
PhysX 5 came out when I started this project, which was a very good news for me since it hasn’t got any update for almost two years.
I’ve integrated it into my personal C++ projects before so naturally it became my choice for physics engine, since I didn’t have the time to implement my own.
I’m not really interested in testing my crappy physics implementation over and over to make it barely functional. I’ve tried that before.
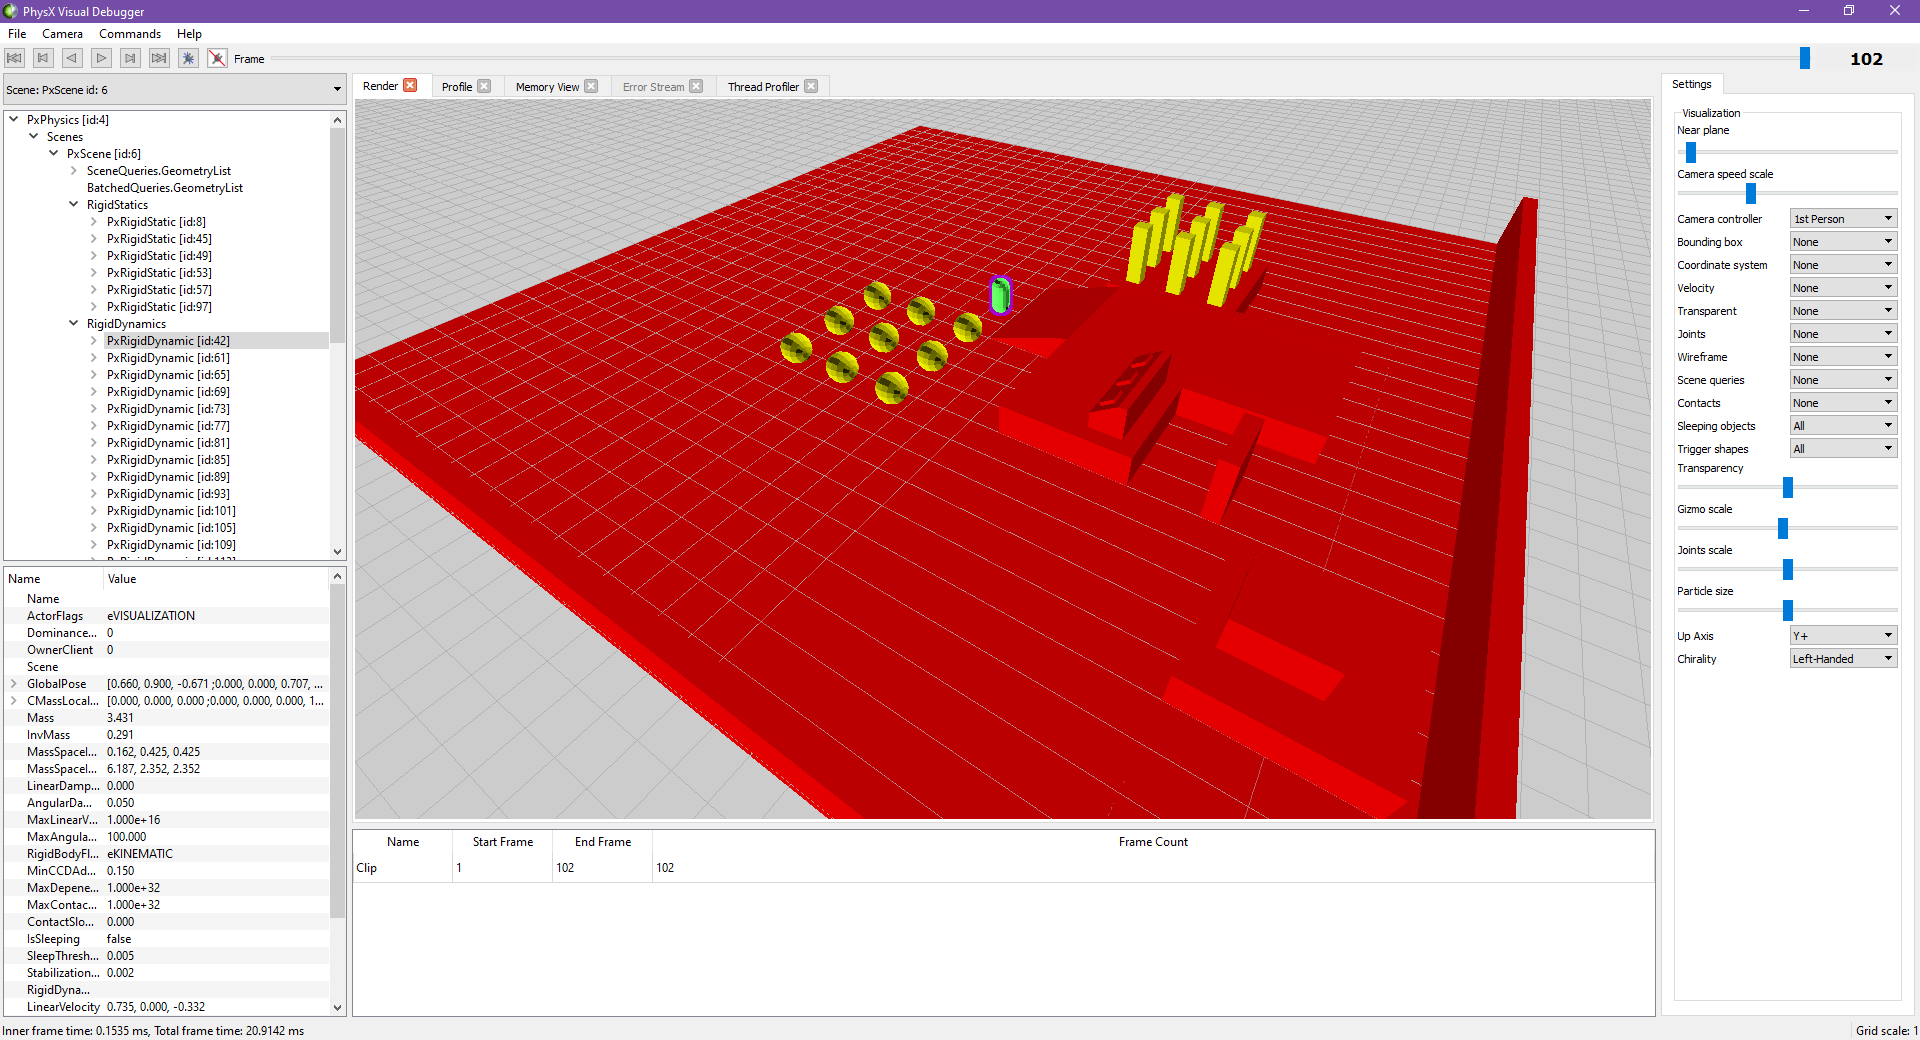 Physics debugging with PhysX Visual Debugger.
PhysX Visual Debugger Works perfectly except that I can’t make the chirality setting defaults to left-handed. 🙂
Rigidbody movement extrapolation
My physics simulation runs at a different frequency (50 fps) than the game update-render loop (typically 60 fps). If you are a hard-core professional FPS player, you probably have a 144 (or higher) fps monitor, which makes the physics simulation even slower comparing to the game loop.
That brings me a problem: physics simulated objects are laggy. It becomes very noticable if you have better dynamic vision (and a high refresh rate monitor).
The common solution to this is to extrapolate physics objects based on velocity, and that’s exactly what I did.
void Actor::Update(float deltaTime) {
    // ...
    const float timeError = CalculateTimeSinceLastFixedUpdate();

    GetTransform().SetPosition(m_position + m_velocity * timeError);
    // ...
}

void Actor::FixedUpdate(float fixedDeltaTime) {
    // Get simulated position and velocity from PhysX
}
There’re problems with this technique, though:
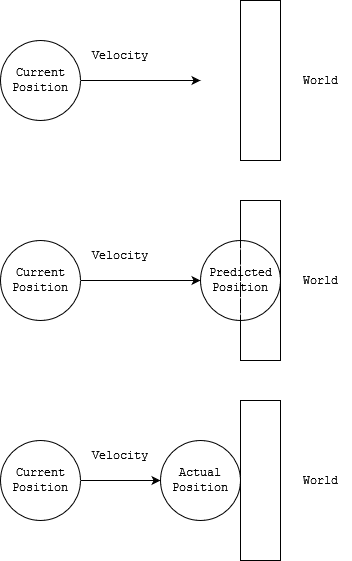
It’s possible for the extrapolation to make wrong predictions and objects would visually clip through each other for a frame. However, according to my testing it looks okay as long as the Physics simulation runs at higher than 20 fps. So this is good enough for me.
Kalman-Filter based Character Controller movement prediction
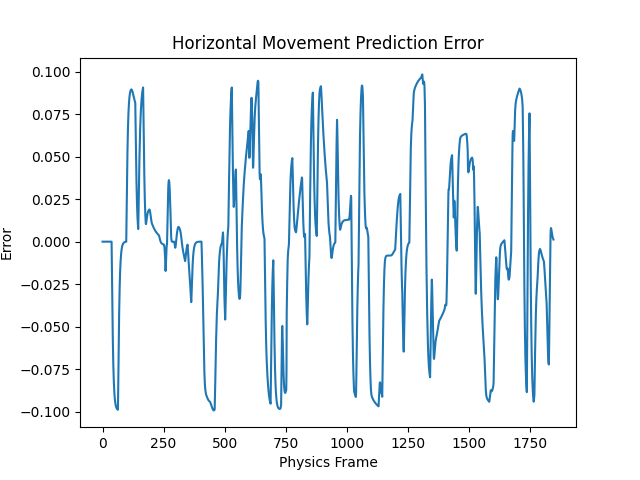
The player character movment component is based on Kalman Filter instead of extrapolation, which allows it to handle sudden movements better. The Kalman Filter runs every physics frame (FixedUpdate) and here are some plots of the Kalman Filter in action.
As a reference, the player walk speed is around 5 units per second, and the FixedUpdate frequency is 0.02s per frame, so the position delta per physics frame is 0.1 unit. As you can see here, the predictions are pretty accurate.
The recoreded vertical movements are only jumps and falls, but they are all sudden changes so the filter doesn’t outperform extrapolation-based methods:
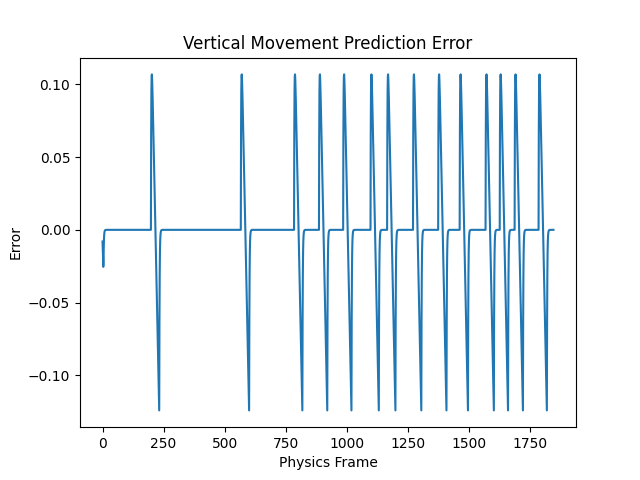
The horizontal movement predictions are much better: